Showing posts with label Photoshop. Show all posts

Monday, July 1, 2013

Cropping a Photo in Photoshop

Inspired by the release of the latest CC update to Deke's Photoshop One-on-One: Fundamentalscourse at lynda.com and realizing Deke's has been covering the basics all the way back to CS3, I've decided to launch a new feature here at dekeOnline: Friday Fundamentals.

Unfortunately, today is Saturday. Well, actually it could technically be Sunday by the time I get this post up. But hey, if you're one of those healthy folk who unplug for the weekend, you won't even see this until Monday. So, I'm going to indulge my fatal love of aliteration and just stick with Friday. As far as you know, that's when I wrote it. Plus any day is really a good day to get your foundational bearings. Right?

So here's the idea, every Friday (or in this case faux-Friday), I'm going to take a dekeInfused look at some foundational feature of Photoshop, InDesign, or Illustrator. Because sometimes, as awesome as Deke's inspired techniques are, he's also great at teaching the basics. Stuff this info into the storage banks at the back of your mind so you can use the front of your mind for the wildly interesting stuff. And today's (OK, yesterday's, or possibly the day before's) topic is cropping a photo in Photoshop. 


Cropping a photograph gives you the opportunity to rethink your composition, hone in on what is important to you, remove distracting peripheral elements, change the angle, and generally, better tell the story you want your photograph to tell. Photoshop's Crop tool has changed for the better over the last few versions, and straightening has gone from a notorious secret handshake to a simple-to-use feature of the crop environment. Here are the fundamental things to know about this foundational feature:

For this exploration, I'm using an ordinary vacation snapshot I like to call Deke and a tree in New Mexico that I took with my iPhone. When you're driving on deserted roads with Deke, or any road with Deke, you have to be prepared to amuse yourself when he pulls over to examine something that catches his graphical eye. And in truth, the fact that Deke and the trees are the only thing around caught my graphical eye, and inspired me to document the moment. I can use a creative bit of cropping in Photoshop to tell myself this charming visual anecdote even more powerfully. 

1. Enter Photoshop crop mode by clicking on the Crop tool in the toolbar. 
Apparently, the Crop tool icon in the Photoshop toolbar looks like a real-world crop tool. Also apparent is the fact that these tools are so rare nowadays that I can't confirm this via my second favorite educational tool: a Google image search. So I illustrated things below in case you, like me, have never seen a real crop tool. Click the icon to enter the Crop mode. 


Immediately, you'll see a an outline with handles at the corners and side-midpoints of your image. You can grab any of these and move them to start changing the visible area of your image. You can also click and hold out beyond any of the corners, wait for a curved double-headed arrow, and use that to change the rotation. But before you do that...

2. Hide rather than delete unwanted pixels for a non-destructive, editable crop. 
Photoshop allows you to merely hide the pixels you crop away (rather than delete them entirely), so that you can revisit your cropping decisions later on. To make sure this happens in a post-CS6 Photoshop, make sure the Delete Cropped Pixels checkbox is turned off ("turned off" is dekeSpeak for unchecked).

This got me thinking about how it works in earlier versions of Photoshop, so I went off and watched a bit of Deke's Photoshop CS5 One-on-One: Fundamentals version of the Photoshop cropping chapter. If you're working with a pre-CS6 version, make your image is an independent layer (not the background), then choose to Hide (rather than Delete) the Cropped Area in the options bar for the same preservative effect. 


Note: Deke's been covering the crop tool for so long, you can find Crop advice for your version of Photoshop in Chapter 6 or 7 of any of these versions of the Fundamentals course

3. Straighten early, straighten once. 
As I mentioned, you can straighten an image manually in the Crop mode by clicking and holding outside one of the corners and waiting for the curved double-arrow cursor to appear, then dragging to rotate your image. In a post-CS6 world, you can also grab the Straighten tool from the options bar. Then click and drag across your desired plumb line...


... and let go. Photoshop will rotate your image in the window so that the line you drew becomes the new horizon (or whatever the vertical equivalent of a horizon is if you're dragging closer to 90 degrees). As you can see, you're going to crop away any outer edges that extend beyond your new boundaries. This the the reasons you want to straighten early, before cropping for composition, because you are going to loose some edges based on how far you rotate. 


Whatever method you use to straighten a photo, be sure to do it only once, because every time you straighten, Photoshop has to rewrite the file. The pixels that make up your photo are a) square and b) exactly upright. So if you rotate them (as you're doing when you straighten), Photoshop has to reassign every pixel reinterpreted for that rotation. 

4. Further refine your crop to change composition and remove unwanted elements.
Cropping may seem mundane, but it's actually an opportunity for great expression. You can exclude elements from a scene or purposely place things in the frame to enhance or decrease attention to them.

The default helper grid on the Crop tool's overlay is the Rule of Thirds. This compositional guideline asserts that the key elements in your image should be somewhere around the cross-sections of those one-third lines. I generally find the Rule of Thirds to be a useful structure to mildly butt my aesthetic opinion up against.

At this point in the cropping, I'm manually moving each of these sides to remove things I don't want at the edges (a fence post, some uninteresting shrubbery) and to set tiny Deke in the center of the frame so that he becomes an interesting if small figure rather than an inexplicable speck. I have caved to convention and put the trees at the lower right crossroads. And I also made set the landscape at exactly the lower third, because one way to chafe against convention is to embrace it literally. 


Obviously, when you're cropping, you can see the parts that you've abandoned behind a "shield." You can change the color and opacity of that shield in the options bar. Mine's set to black and 40 percent opacity. 

Note, that your cropped image now extends beyond the document's canvas size (the "shielded parts," that is). This means that you can drag the image within the visible area to change which parts of the photo are visible. 

Bonus Tip: Consider your composition in black and white. 
Deke's colleague at lynda.com, Ben Long, has an excellent course on photographic composition, aptly entitled Foundations of Photography: Composition. In it, Ben points out that, often, viewing your image in black and white allows you to consider geometry and tone without the distraction of color. For this image, the arrangement of tonal elements (darker bit of sky, light grey road, white clouds, dark trees, dark Deke) pleases me. 


5. Consider the story you're telling.
The final cropped image definitely tells the story I was trying to document. I like the way the sky goes on forever vertically and the road visually expands the virtual Z-axis. It also nicely conveys that a visual person like Deke can find a compelling subject when there seems to be nothing around for miles along any axis. 


As I mentioned, the Photoshop's Crop tool underwent some fairly substantive changes with CS6. But there are Cropping and Straightening chapters in Deke's Photoshop One-on-One: Fundamentals courses going back to CS3. You can choose the course you need from this list. And if you need a free week's trial at lynda.com to check it out, go to lynda.com/deke and sign right up.

Thursday, June 27, 2013

Deke's Techniques 234: Creating Volumetric Monster Parts with Photoshop Shape Layers

Tutorial

What, you ask, are "volumetric monster parts?" Well, check out this week's free movie and find out. OK, it's really just me replacing the mundane word shapes with the awesome phrase monster parts. And that's basically this week's Deke's Techniques in a nutshell: Deke started with a sketch he created with his son Sam, turned it into shape layers, and then gave the alien dude real volume with the use of deftly applied layer effects.

In other words, this semi-frightening visitor from the absurd mind of McClellands was created solely by entering parametric instructions to Photoshop. (OK, a bit of pen-toolery was required in the transformation from a pencil-and-paper sketch, but the lovely shading of our hero's green complexion was created primarily from entering editable values into Photoshop's Layer Style dialog box.

Sunday, June 23, 2013

Deke's Techniques 227: Creating an Animated Movie in Photoshop


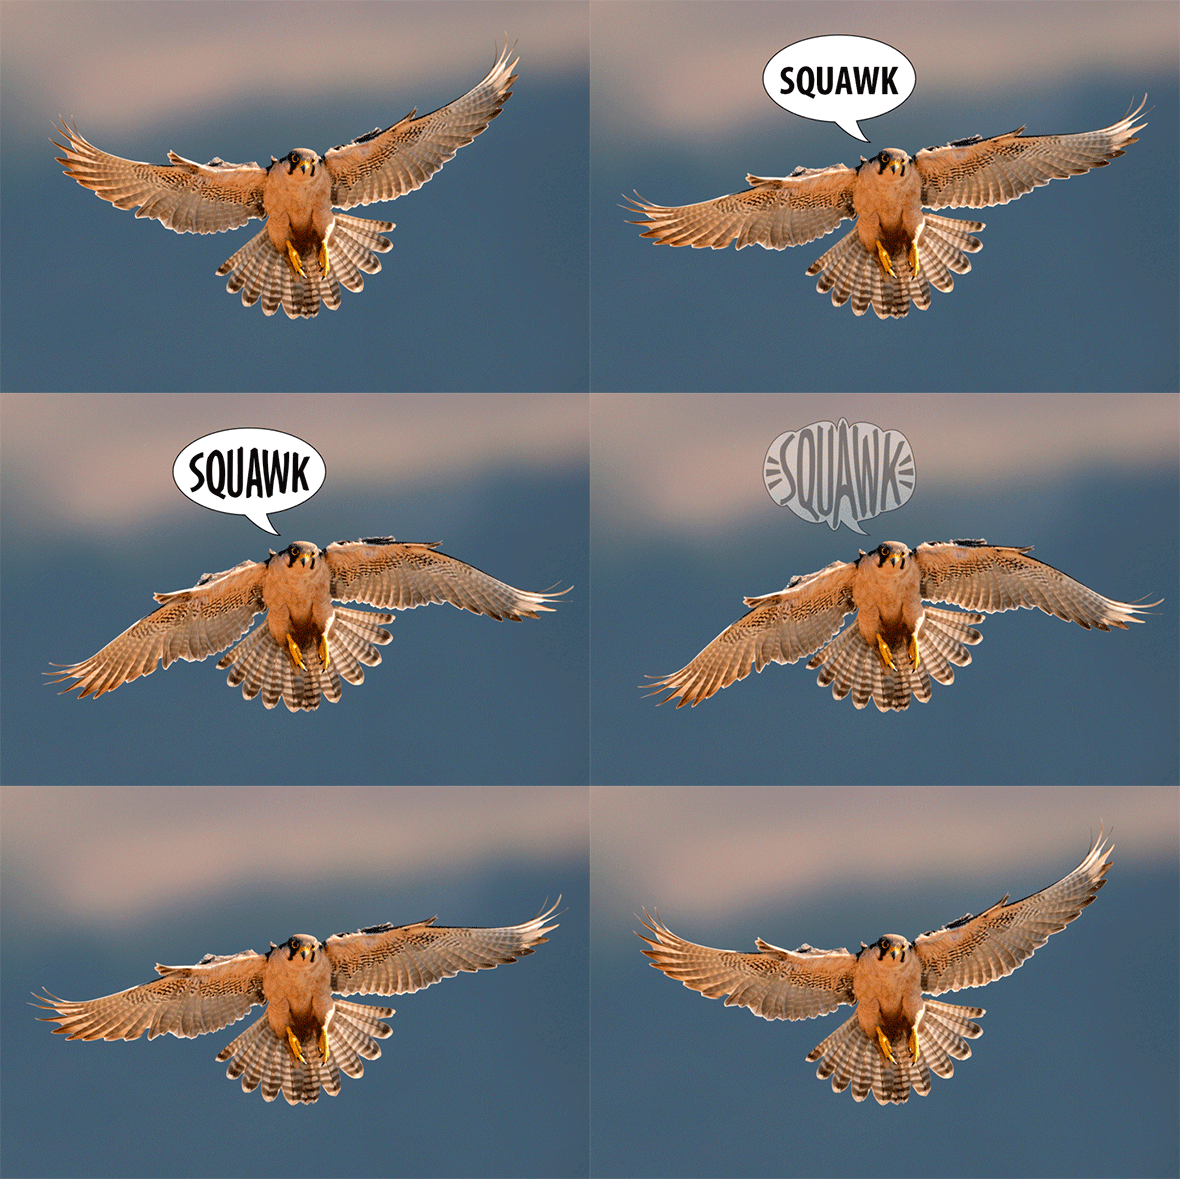
In this week's free Deke's Techniques episode, you'll witness how Deke compiles the Puppet-Warped results from last week's technique into a falcon-flapping animated movie inside Photoshop. Now as much as I try, on a weekly basis, to turn video-based Photoshop education into eloquent, elucidating prose, this is one of those cases where the medium should be the message. In other words, if you're interested in learning how to create a moving picture, then moving pictures are probably the best way to show you how to do it. So watch the video, because Deke carefully goes through the process in that methodical way that reassures even someone like me that they can do it. And because this squawks for itself:


Creating a Refreshing Animated GIF from Shape Layers in Photoshop


Tutorial

It's the weekend, and I'm in need of refreshment and dekeCompression. To that end, I've put together some of the things I've learnt on this very site over the past few weeks and whipped up my very own animated mojito.


I created this project with a combination of advice I got from Deke's Techniques on Creating an Animated Movie in Photoshop and some things I discovered when working on my own Five Useful Observations for Understanding Photoshop Shape Layers post a few weeks back.

The result was a fun, easy project that's almost as refreshing as a real mojito. And creating digitally means no crushed mint leaf particles or freshly squeezed lemon pulp getting in your hair. (Yes, this really happened. In a previous life, I had to make gallons of mojito mix at a time. Probably why I switched to concocting clean, sleek martinis.)

Anyway, you should try it out, especially if you're new to animation or want to post a hilarious GIF on your website. Here's my general recipe you can adapt to your own animation:

1. Plan the content.
My creation started as a full cocktail, made when a friend of mine teased me about my over-reliance on martinis. I started with a simple rectangular document and added shape layers for each component.


No drawing involved (the way I prefer it). The green liquid and the straw were simple rectangular shapes. I drew the ice cubes with the same rectangle shape tool with the Shift key held down (to make a square). And the mint leaves are variations on a shape (Leaf 3) that's available from the Custom Shape picker. Choose the Custom shape amoeba icon in the toolbox then click the down pointing arrow next to the current shape to see the variety of pre-fabricated shape options you have in Photoshop.


I put every item on its own shape layer, even when they were filled with the same color, so I could easily move the forms around independently. Despite Photoshop's new abilities to combine multiple paths on one shape layer, this overly cautious approach was better for my inexperienced mind. Then I selected all the shape layers and grouped them together by choosing New Group from Layers in the Layers panel flyout menu.

2. Create the incremental stages that will eventually become frames.
For Deke's flying falcon animation, he used Puppet Warp to make incremental changes to the bird's wings, each on a separate layer. In my case, I duplicated the Full layer group en masse, and named the new group 75 (as in, someone just drank a quarter of my mojito). Then I adjusted each shape layer in the new group, letting the ice cubes and mint leaves float artfully down the glass as the liquid receded. I repeated for each increment.

(Technically, I could have just used one set of shapes, changing the position of the various pieces in the timeline, and using the frames to capture each configuration as I'll mention below. But this is my first animation, and I'm trying to work carefully.)

3. Create a New Frame Animation in the Timeline Panel.
When you open the Timeline panel for the first time, there's an oddly placed popup menu right in the middle of the horizontal panel. The default setting is Create Video Timeline, so I changed it to Create Frame Animation. (It appears this setting is sticky, so the next time you open the panel for a new document, it will be set where you last left it.)


Photoshop automatically creates the first frame from the layers that are visible, which in my case was the Full group. It also automatically sets the time at 5 seconds, which, if you've ever seen an automated GIF in the wild, you know is too long. We're thirsty. So I changed it to 0.5 seconds in the popup menu just below the frame. Changing this now means every new frame will be set to 0.5 seconds as well.


4. Add the other frames.
There are multiple ways to add frames, but again I chose the slow-and-steady approach for this first foray. If you click the page icon at the bottom of the Timeline panel, a new frame appears and immediately reflects whichever layer(s) you have visible in whatever state (position, opacity).

The key to working with frames is to think of them like very sensitive layer comps. Each frame is a snapshot of the layer visibility, position, and opacity you have going at any moment. But be careful, if you have a frame selected, it's going to change to whatever is going on in the Layers panel.

In other words, maybe snapshot isn't the best term. The frames aren't set permanently like a snapshot, and any time you have one selected, its content is subject to change. I set up frames that corresponded to each of my layer groups. (Turning off all the other layer groups for each frame.)

Again, you can use one set of layers, moving the pieces around and capturing their state for each frame. As you return to each frame, the layer configuration will return to how it was when you last had the frame selected.

5. Run the animation from the timeline panel and adjust to taste.
Here's where I contemplated how artfully my ice cubes and mint leaves should sink to the bottom. Just push the Play button triangle in the Timeline panel to watch your animation.


6. Export as a GIF.
The key to exporting a GIF is to use the Save for Web command (File > Save for Web). In the dialog box, I naturally chose GIF from the format popup menu (easy choice). But the more complicated decision here is the number of colors. You want to get it as low as possible to keep your file size small. The key is to find the minimum number of colors that still keep your image intact. In my case, things looked pretty good at 16, but when I tried setting colors to 8, the edges got ratty. So 16 it is.


The other key choice to make here is whether you want it to run Once or Forever. I originally chose Once, but on second thought a bottomless mojito might be the better call. Cheers, my dekeCompadres!

If you'd like how Deke put his animation together, be sure to check out Deke's Techniques 227 and see Deke and his falcon (and his falcon's menacing squawk) in action.

Monday, July 23, 2012

How to Create a Stunning Winter Princess Artwork in Photoshop


Learn how to create this winter scene in Photoshop. You will learn how to blend photos and textures, create a cold blue photo effect, and more!


Monday, July 16, 2012

Invisible Man Inside a Mystic Cave (Photoshop Tutorial)

How to Create a Surreal Scene with an Invisible Man Inside a Mystic Cave

Learn how to create a surreal photo manipulation with an invisible man. This tutorial will teach you how to blend different images together, create realistic shadows, and paint light reflections in your image.